Thursday, December 12, 2013

Think Digital/Act Analog; Carving the Block

In my recent posts, I've been detailing the evolution of a design from the initial idea to a finished print, using my current project Think Digital/Act Analog to demonstrate. In my last post I shared my process for transferring a design from paper to linoleum. I also said in the last post that I probably wouldn't get a chance to finish carving the block until after the holidays. As it turns out, I was mistaken. In an awesome way.

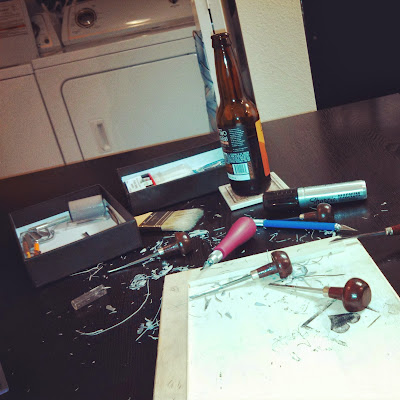
I started carving on the "digital" side of the block. Retaining a steady hand while carving the small, straight, and somewhat repetitive lines was slow, but nothing too difficult. The lettering proved to be a little harder, but slowly it started to take shape. Unfortunately, I didn't get a good picture of the lettering while I was carving it.


Here's a view from above after I've darkened the lino to make it easier to see the contrast. I do this often, because it allows me to see where I've already cut. 


The entire background of this half of the block required carving, which wasn't difficult at all however it was time consuming. 


On the other half of the print, carving the text was a piece of cake! Since the background on that side is black, there was no need to outline the letters; instead, I could just slowly excise them so that they won't transfer any ink when I finally get around to pulling prints. 


So far Think Digital/Act Analog has provided me with some minor challenges, but nothing that I couldn't handle. The real test of my ability was carving out the brain.


There was a lot of lino to cut, and a lot of small detail lines to add the appearance of texture and shading. I haven't really done anything like that before, so I needed to move slowly and learn as I worked. This made me a bit anxious; I understand that every design is a learning process, and that even if it doesn't end up looking right it is good experience and improves my skills. That being said, it isn't the best feeling in the world when you spend hours carving on a block and then don't have a good print to show in the end. To avoid that kind of disappointment, I worked very methodically.


It's always important to keep your tools sharp as you work, so I periodically run them along a strop. I prefer using a strop rather than a whetstone on my carving tools, because as far as I'm aware the leather can't change the angle of the blade whereas a whetstone can. My strop is just a simple piece of wood with a rough bit of leather on one side, and a smooth bit of leather on the other side. I suppose it does have a fairly nice handle though. I picked it up on amazon, as well as a little polishing paste to use with it, for probably ten bucks total. It has made a world of difference since I started using it; sharp blades do a lot better than the alternative. This was incredibly advantageous on this project; on the "analog" side there were a lot of curves and fine lines, and I have no doubt that if I had tried to carve them with dull tools, I would have done an incredibly poor job. Instead, I felt like I was doing a pretty damn good.


As I finished up, things really started to come together, and my anxieties subsided. It was looking more and more like what I had in mind when I first imagined the design. Which, of course, pleased me to no end!


And like that, the block is done! It looks pretty great and I'm very happy about how it turned out. I can't wait until I have the opportunity to pull some test prints and see how they look. I'm sure that there will be some adjustments and some fine-tuning necessary, but I'm very pleased with how it has worked out so far!

I realize that this post was very photo-heavy. There just isn't too much to explain about the carving process; a lot of it is repetitive, and unless you want details on what particular gouge I use for different cuts, I figured that you would rather see the results than hear about why I like certain gouges for certain shapes and cuts. If you're interested in more details, however, I'm happy to share them!

I will, of course, keep you posted when I pull some test prints. If you've stuck with me this far, I encourage you to check back to see when I get the next post up detailing the next step in the Think Digital/Act Analog adventure. And since it's time to start with the actual printing, it's when we'll see the whole design really emerge as it's meant to be!

Thanks for stopping in and reading. I appreciate everyone who comes and checks out my projects. If you have any questions, I'd love to answer them, so hit me up on the comments. Also, if you're interested in getting any updates on when new posts are coming out, or if you'd like to read the randomness that is my life via 140 characters or less, follow me on Twitter: @CaptGam


Creative Commons License
Unless otherwise noted, all work by Wade Ellett is licensed under a Creative Commons Attribution- ShareAlike 3.0 Unported License.


Monday, December 9, 2013

From Drawing to Block

It seems like it's been forever since I got a post up, but life has been busy. So it has taken me a little while to get rolling on Think Digital/Act Analog. But here we are now, so let's talk about printmaking! More specifically, let's revisit the design.


Now as you may remember, this image evolved from a quick doodle, to a better sketch, and then an even more refined one. Today, I'm going to show you what happens next. First thing first, I need to clean up the typeset. The "analog" style type works fine for me, but I've been having trouble finding a typeset that captures the "digital" aesthetic. After a little more playing, tracing on grid paper, transferring back and forth (forever), so on and so forth, I finally get something that fits the look I'm going for...


It's clean, and has the right look and feel to it without looking (too) campy. So with the design pretty well cemented, it's time to get the design onto the block. How do we do this? There are a number of techniques printmakers use, but the technique I use most often and the one that I'm going to show you today is using a transfer sheet. 

I start by taping the design down and then taping a sheet of tracing paper down on top of it. I like to make sure everything is secure so there isn't any slipping or moving around.


Once the design and the tracing paper are snug and secure, I start tracing over the design with a soft graphite pencil. This can be pretty time consuming, especially when there are a lot of fine lines or intricate details in the design. 


After the somewhat laborious task of tracing is done, it's time to actually transfer the design to a block. This means turning the tracing paper over, lining it up on the block and securing it down again, like so...


Now it's time to transfer the design to a block. It's simply a matter of tracing over the lines again. Since I'm pressing on the backside of the paper, the soft graphite I initially traced with will print onto the block as I retrace the lines.


The retracing takes a little time as well, but after it's done, we're just about finished with the transfer. To make sure that I don't ruin the design on the block while carving it, I go over the lines with a fine permanent marker. After a few minutes time to let it dry, the block is ready for carving. 

You can see that in the bottom right corner I have excised a star out of the block already. It's a little reminder of how I want to carve the block; from that little star I can extrapolate what areas I decided to carve, and what areas I want to leave uncut. The image is in reverse because, as you probably remember, the block will serve as a negative to the print. So everything is backwards on the block, but it will come out right as rain when we pull the prints!

So now the block is ready to carve! Unfortunately, I don't know that I'll have enough time to get it all carved before I start my holiday travelling. If I can, I'll be sure to let you know. Either way, I'll keep you posted. Thanks for reading and if you'd like updates on when new posts are coming out, or if you'd just like to experience the art project that is my life via random bursts of information overload in 140 characters or less, follow me on Twitter: @CaptGam

Keep your eyes peeled for the next update, and don't hesitate to hit me up on the comments!


Creative Commons License
Unless otherwise noted, all work by Wade Ellett is licensed under a Creative Commons Attribution- ShareAlike 3.0 Unported License.

Wednesday, November 20, 2013

A Quick Update!

Hey everybody, I hope you're doing great. I wanted to touch base and write a mini-post for you tonight. I've been working on a post that will take the Think Digital/Act Analog design that I developed a few posts ago, but since I'm documenting the steps that I'm taking from the design to the final print, and because I was away this previous weekend, everything is moving just a bit slower than I would like. That being said, be sure to keep an eye out and check back soon, because I'm planning on having that update posted by the end of the weekend. 

Even though that post is in the works, I wanted to make sure that I actually got something up for you to read tonight. Until recently I was a sporadic blogger (at best), and I don't wish to relapse into old habits. This being the case, let me bring you up to speed on what's going on in my world... As I mentioned above, I went away this weekend. I took a whirlwind drive to South Dakota to see my ladyfriend, which entailed more driving in one weekend than I would have preferred, but it was a much needed visit. In printing news, the daffodil run that you saw last time turned out great across the board. I didn't need to print nearly as many proofs as I did to make sure everything went smoothly, but better safe than sorry I suppose. 

Daffodil #1 and Daffodil #2 mounted on acid-free card stock

I sent these first two prints to my friend Chris Willis. He made the unfortunate mistake of complimenting my work and asking me questions about my printmaking. In exchange for his curiosity he was trapped under a novel sized explanation of paper size, variety, and other details, because if you get me started in a dialog about printmaking, I have trouble stopping. All that being said, I'm glad that these two prints are going somewhere that I know that they will be appreciated in their new home. 

Another interesting development; tonight I attended my first meeting of the Left Bank Art League. I'll admit, it was a little intimidating, but it seems like a great group of people. I haven't really worked in any group settings for a long time, and I kind of missed the camaraderie that I recall from studio time with Sean-O and others in my teen years. So I gave it a shot and it seems like it'll be a nice place for me to develop. I didn't meet any tonight, but apparently there are a few other, more experienced, printmakers  in the group from whom I can hopefully learn a few things. Additionally, after the meeting portion of the meeting, we made squeegee paintings in the style of Gerhard Richter, which was an interesting new experience for me. 

And they didn't turn out too shabby, if I do say so myself.

Well, this update ended up being more substantial than expected. Thanks for checking in and reading and remember to come back soon to see how Think Digital/Act Analog is coming along. If you'd like updates on when new posts are coming out, or if you'd just like to experience the art project that is my life via random bursts of information overload in 140 characters or less, follow me on Twitter: @CaptGam

Keep your eyes peeled for the next update, and don't hesitate to hit me up on the comments!


Creative Commons License
Unless otherwise noted, all work by Wade Ellett is licensed under a Creative Commons Attribution- ShareAlike 3.0 Unported License.

Thursday, November 14, 2013

Daffodil Run

Greetings all! I hope your week has been kind to you. Mine has seemed long, but it hasn't been too shabby. I've been busy working on a few new designs, as well as taking a look at some old ones, doing a little inventory (I'm just about out of lino!), and reviewing some proofs and final prints I've already pulled.  

This past weekend I finally got to do a complete run of my daffodil prints. I have been working on these blocks for awhile now, and pulled new proofs on Friday night. After reviewing them, and making a few additional corrections, I felt like they were ready. So, come Saturday afternoon, I got started. 

The first step is tearing the paper, which isn't the most exciting thing in the world. It would be quicker to get a paper cutter, but I prefer tearing for three reasons. 1) Traditionally, that's how block printmakers have prepared their paper, and I'm a little sentimental. 2) I like the appearance of the torn edges. While I almost always end up performing a "trimming" tear after the prints have dried, I prefer to tear the sheets from the beginning, in case I accidentally print too near an edge. 3) I'll admit, I rather like the sensation of tearing the paper. I'm very tactile.


After I've torn the paper, I prep the blocks, the ink, and the table. I currently make all my prints either by hand with a baren, or by using a small hand operated lever press. When I make test proofs, I try both methods to see which works best, and in this instance, the results were pretty comparable. That being the case, I decided to use the lever press. I'm only doing small runs with these blocks, with twenty final prints for each design. That isn't a huge run, but generally I print extra in case of errors, so after printing both blocks, I ended up pressing 60 prints that night. I'm glad to have the lever press for that, because hand-printing 60 of these with a baren would have taken a whole lot longer!


After I finished the second run I needed to clean up the mess I had made. Which, lets be honest, no one wants to hear about. Because it's cleaning. Unfortunately, there isn't anything else to do with the prints until they dry, which means it's time to wait. Also, it means there isn't a whole lot of room in the apartment; I don't have a drying rack, so all of my counter space, and/or any other flat surface gets covered in prints anytime I do any sort of run. 


The ink I'm using is probably dry in about 2-3 hours... But why risk it. Best to check up on things the next day... So when Sunday came round, and the prints were dry, I could get back to work. It starts with more reviewing; some prints don't turn out well for a number of reasons (mostly my errors), which is why I always print extra.


After selecting which images to save, and which to disregard, it's time to trim them down. I like to have about a 1/2 inch margin surrounding my images. After all the tears are made, I can begin to edition the final prints. Editioning is simply recording the print's number and total number of prints in the run, the title of the work, as well as signing the work. This is traditionally done in pencil, and being a bit of a traditionalist, I do it in pencil as well.


The above picture shows the final product! It looks pretty good if you ask me, but I am admittedly a bit biased. 

If you like these prints and want to throw a little support my way, or if you have any questions for me I would love to hear from you in the comments. I'm also on twitter as @CaptGam, and regularly tweet about the random art project that is my life. Thanks again for reading about my misadventures in printmaking.


Creative Commons License
Unless otherwise noted, all work by Wade Ellett is licensed under a Creative Commons Attribution- ShareAlike 3.0 Unported License.


Friday, November 8, 2013

How My Designs Evolve.

Greetings all, and welcome back. Let me start by saying thanks to everyone who has come and checked out my blog here. I appreciate your views. I also appreciate those of you who sent me e-mails asking me questions or just telling me you liked one of my designs. I love talking to people about my prints, as well as just about any other creative venture. A few of you asked if I would be able to make prints for you or to do some design work; I would love to do some design work with pretty much all of you. Feel free to contact me via e-mail, twitter(@CaptGam), or comment here on my blog and we'll see what we can do! In fact, I encourage any of you who visit my neck of the woods here to hit up the comments section and share your thoughts, constructive criticisms, or questions with me!

After my last blog, I was thinking about how I shared a bit of my creative process with you. Tonight, I thought I would illustrate that process for you a little bit. You see, it all starts with a quick sketch or doodle, like this...


Well, that's not entirely true. It starts with an idea. I'm sure you know the feeling, you're going about your day and then an awesome thought pops into your head. I've found that if I don't write it down or do a rough sketch of it right that moment, I tend to forget it. To make sure I catch as many of my ideas as possible, I always have a Molskine notebook in my bag, and I have Evernote sync to my phone, tablet, and every computer I use so I can capture and work on an idea anywhere I happen to be. This idea, "Think digital, act analog," isn't new. It's a saying that a friend and I used to throw around years ago, but it's been on my mind a lot here lately due to my day job working on digitization policies and procedures. So the notion was there, and I roughed out the design. Then came the next part...

I had to find a brain!!! As well as a circuit board. Obviously, I don't keep brains stocked in the apartment, so I had to hunt for good images to use. This sounds like an easy Google search, but it is a bit more complicated than that. I don't want to copy an image of a brain, I want to draw one of my own. So I look for pictures of actual human brains, and just to be safe, I keep my searches to copyright free imagery. Then I do the same for circuitry. Then I start taking the elements of those images and reinterpret them into my design. 


The overall result is pretty good. The brain looks pretty good, although I feel like there is a bit too much black space. The circuitry, however, I wasn't very happy with at all. It looked more cartoon-like than I was hoping for. So I did a little more research, and looked at some gutted electronics, and gave it another shot. 


This time, I feel like I've hit on gold. I still need to do some work on the font, and work out some details, but this design is getting pretty close to where I want it to be. Obviously, there is still a lot of work to do before this is ink on paper. I'll need to hammer out the remaining details, figure out how large I want the final print to be, transfer the image to the block, and start carving. Even after I finish the carving, I'll print some artist's proofs and then go back to carving some corrections in the block. It may sound like a lot of work, and it is. But it's a labor of love, and as I'm sure that many of you know, when you love something the work is well worth it. 

As this design moves through the steps to becoming a finished print I'll bring you along for the ride. Meanwhile, I would love to hear from you. Again, catch me on twitter (@CaptGam), or leave a comment. I'm open to any and all questions, and I would love to hear about anything you like to create, or anything you're passionate about. And if you're wondering if I'd like to work with you on prints or designs, don't be shy; I believe in a community of creativity, and love to collaborate! 

Until next time friends, keep creating. Even if it's just in your imagination!

Creative Commons License
Unless otherwise mentioned, all work by Wade Ellett is licensed under a Creative Commons Attribution- ShareAlike 3.0 Unported License.


Tuesday, November 5, 2013

New Stuff in the Works

Well hello everyone!

It's been awhile since my last post, and I've had a lot of great stuff going on here in the Quad Cities area. I've taken some art classes, checked out some stuff at the Figge, had my first life drawing experience, and have been exposed to a lot of new inspirations. This all translates into some great new ideas. And those new ideas are being materialized into new designs. So far, the new challenges have been incredible, and the results have been fantastic. I just pulled some proofs last week, and they look pretty great. They still need a little fine-tuning, but I can't wait to share them with you!
In Con We TrustStill needs some work, but it's one of the pop-art inspired prints on which I'm currently working.
I have a lot of things in the works right now, and I'm excited about all of it, but I hate to get too far ahead of myself! So first of all, thanks for those of you who have read this blog before and are reading it now. I have a lot of notes that I've been writing to myself about subjects I'd like to discuss on here, so expect new posts more frequently, and some new work as well. Second of all, if you want to stay updated on when there are new blogs coming down the line, when new artwork is on the hook, or if you're just interested in seeing the random things that run through my brain, please follow me on twitter; @CaptGam. I apologize in advance for the occasional mushy tweet between my ladyfriend and myself. I assure you, my clever and oft hilarious tweets more than make up for it. And speaking of the lovely lady, she too is a bit of an artist, so if you're in the market for some handmade jewelry (and the holidays are coming up, so I'm sure some of you are), check out her Etsy site, ClarissaThompson.etsy.com.

But I promise, I didn't just start writing this post to promote us! I also wanted to briefly talk about my creative process a little bit, because a couple people have asked me, "what were you thinking when you made that?" Well, that's a little bit of a complicated question for me, because printmaking is a long process. I spend a lot of time brainstorming a design, making a lot of doodles and quick sketches before even really sitting down and trying to work on a serious design. The process of finalizing a design can take me up to eight hours. Then I transfer it to the block, and the carving takes at least a few hours as well. I usually have fifteen to twenty hours of work in a print before ink is even brought into the process! I'm sure a lot of printers work faster, but everyone's process is a bit different. Anyway, my point is that it's incredibly difficult for me to narrow down "what I was thinking" while making a print. My thoughts on a design evolve while I'm working on it and what it means by the time it becomes a finished print can be completely different than what I was thinking when I started! For those of you who know me, my brain can move a mile a minute, so I think about a lot of things while I'm working, or sometimes it helps me clear my head and I think about nothing. That's part of why I love printmaking. 

My process isn't always a neat and clean one. Actually, it never is.

What do you do that's creative, and what kind of process do you have? I'd love to hear about it, so please feel free to leave me a comment. If you like what you read, and you know anyone that you think would also enjoy it, I would appreciate it if you shared my blog with them. And don't forget to check me out on twitter @CaptGam.

Thanks for checking out my blog today everybody. I hope you enjoyed it, and I hope you're having a great week. See you next time!

Creative Commons License
Unless otherwise mentioned, all work by Wade Ellett is licensed under a Creative Commons Attribution- ShareAlike 3.0 Unported License.

Wednesday, August 14, 2013

Time for some changes, y’all!

After a fantastic visit from the ladyfriend I took some time to get caught up with my old friend and former housemate this evening. We spent some time on the phone discussing a novel he wrote that I was lucky enough to get a chance to read. I got to tell him some of my thoughts about it, and he shared some tidbits about where the next book will lead. It has really come together to be a well thought out, well written, and well executed tale, and I'm very proud of my friend for bringing his ideas together in an awesome story. It was great to talk to someone who was manifesting their creativity and had an excellent "end-product" to show for it. In addition to really loving the story, and really enjoying the conversation, it also was an excellent motivator; it helped me pull together some of the things I've been thinking about in regards to my own creative pursuits as of late.
I’ve spent a lot of time doodling and reading the last few weeks, but not a lot of time working on anything print related, which is unacceptable! I’ve really enjoyed my experiments so far, but as anyone who knows me at all could tell you, I am lousy at time-management. It’s time to try to do something about that.
I recently stumbled upon this article:
And found it pretty illuminating. Then I followed a link to this article:
This made me realize just how inefficient my use of my time has been. So I scheduled my life. As in, I scheduled my entire life; the time I will wake up, when I go to work, when I eat, when I will go running, when I will work on my art, when I will do housework, and when I will go to bed. It sounds terrible, I know. Truth be told, I will probably hate the over-structured day to day for a couple weeks, but after I get into a rhythm, I think it will be very fruitful. After a couple months, when my schedule becomes habit, I will probably relax on all some of these things. Once I have indoctrinated myself with my new routine, I don’t think that I will need to have “Prep for Bed” on my google calendar, but I feel that it will be useful for me to establish structure and see just what I can get done when I expect myself to be accountable for my time outside of work. I know myself pretty well, so instead of just throwing myself into it, I've built in a little time to work into the schedule this week, but by the end of next week, I'll be pretty well into the swing of things.
There are, however, some exceptions to my newly scheduled life. Actually, just one exception; the weekend. I felt that it was important to have a few days that weren’t completely schedule oriented in order to relax. I have a post-work run scheduled for Friday evenings, and then I have a loose guideline to work on art or study for at least an hour on Friday and Saturday, but that’s it for those days! On Sunday I have a yoga class scheduled in the morning, and then some time for housecleaning later in the afternoon, but otherwise I have some time to kick back and watch a movie if I want, or go out for a drink or two if I fancy. Then it’s back to a structured, organized life on Monday. This is an entirely new state of existence for me, but I figure that it never hurts to experiment.
While doodling, and during the few times as of late that I have been working on any of my printing designs, I have found myself a little bit frustrated. I have a lot of ideas in my head that are wanting to come out, but my hands just aren’t cutting it! Before I can print a design, I have to cut it, and before I can cut it I have to draw it. The idea may be awesome, but that doesn’t matter so much if I don’t have any way to express it. I’m a long way from when I received any instruction on skillfully putting pencil to paper, and while my patience has improved over the years, I have let my muscle memory fade. Sometimes I just can’t make my hands put the design on paper that I can see in my head. It’s time to rectify this.
Though the main goal is to become a better printer, the step I have decided to take is a drawing class. I have signed up for a five week course at the Figge Art Museum starting the second week in September. If I end up liking the course and find it fruitful, I may sign up for the second course that they offer. We’ll have to see how it goes. Hopefully it will drive my printmaking to new levels by improving my ability to manifest my design ideas. 

All told, these things may not lead to awesome prints right away, but I think by year's end you will be seeing some pretty awesome things up on this blog. With that in mind, I'm signing off for the evening to work on an origami project I've had in the works. 
Cheers until next time!

Wednesday, July 24, 2013

The State of Things

I've been working on a lot of things here lately. I'm a busy little bee, but it keeps me out of trouble. One thing I try to do is to make out at least one sketch every day. It doesn't always get done, but trying to keep up with that expectation has helped me knock some of the rust off of my hands. Some of my sketches are just practice. Some are just for fun, like this little image of the Little Prince, which is definitely NOT my design (talk to Antoine de Saint-Exupéry!).

The Little Prince is one of my favorite books of all times (which you should read if you haven't- Yes it appears to be a children's book, but I assure you that it is not). I did a few Little Prince related works back in my old high school art class days, so I thought it might be a nice way to get the creative juices flowing again.

Some other stuff I'm working on...
Not too long ago I went for a walk along Moline's riverfront. It was a nice way to spend a Sunday afternoon (albeit a very hot way to spend said afternoon). I took my trusty little Molskine sketchbook along with me in case I saw anything worthwhile. I was really pleased with the look of the I-74 "twin bridges" from a nice shaded park bench. So I took some time and dropped a rough version into my wee book. So far I'm calling it "Bridge to Bettendorf" which I think has a nice ring to it. Over the next couple weeks I'm going to blow the image up, refine it a bit, and hopefully get it transferred over to a block. There are a lot of fine lines, different textures, and I definitely need to work on the portrayal of the water, but I think it will end up a very nice print.

I'm also working on a self portrait. So far, it isn't too complex. I usually like a certain degree of simplicity, but I feel like this image needs a little something. I'm contemplating putting this one on the back burner for awhile, and just pulling it out here and there to work on. I think it may be a good choice for a reduction print when I get a little more experience under my belt.


I've also done a few preliminary sketches for a print that I'm doing for my buddy Mikey. It is (of course) agriculture based.

I'm calling it "Bungalow Corn" and it may have to sit on the back burner for a little while as well. I'd love to take this opportunity to experiment with some varying textures in the background, and even in the leaves around the ear, but I'm still looking at different ideas for how to go about doing that.
The blocks from my previous printing run have been "edited" so I can go back and do a full run soon. I'm hoping to have a couple more blocks carved by then so that I can run a couple AP's while I'm at it.

I am sitting on one block that's ready to go, that I call "Open Til Midnite" (someone out there please get the reference).
I'm really excited about pulling this one, because it has some fine lines that were a new challenge for me, so I'm curious to see how they turn out. I'm sure that I will need to do some tweaking and the like, but I think that the design is going to look really sharp.


Well, lots to do, lots to do, so I'm off to get some of it done. Hope you're all having a good day. Keep on keeping on.

Creative Commons License
Unless otherwise mentioned, all work by Wade Ellett is licensed under a Creative Commons Attribution-ShareAlike 3.0 Unported License.

Tuesday, July 23, 2013

First test run

I wanted to take a moment to share some of the prints I've pulled in the last few weeks. These are just artist's proofs so there are still some corrections that I need to make in the blocks, but for a first run, they're not bad. I've got another block ready to print, and a few sketches I'm working on.
This design isn't actually mine. It was a practice print based off of a design in a bar menu. I don't recall the name of the bar, but it was in Detroit. Good mojitos. Again, the design isn't mine, it was just a nice one with which to practice carving the lino.

"Triskellion"
Based on a stained glass window that was based on my tattoo, which is based on the Celtic Triskellion. Full circle.


"Smoking Jesus"
Based on a homeless man I met once. He smoked cigarettes and told us he was Jesus. It was an auspicious evening.
"Clarissa's Elephant" This is an elephant. For Clarissa.

Check back for more stuff soon...

Creative Commons License
All work by http://themisadventuresofwade.blogspot.com is licensed under a Creative Commons Attribution-ShareAlike 3.0 Unported License unless otherwise noted.

Carving Out a New Niche

Anyone who knows me very well knows that I'm perpetually experimenting with the hobby world, trying to find something that feels like a good outlet for me. This oft neglected blog is one of those things, dating back to when I began to script and draw web-comics as a means of coming to terms with loneliness and dissatisfaction with the job I had. But then I got a new job, and taking time to draw out those web comics just wasn’t in the cards. They did their job though; they kept me sane long enough to improve my situation. So I thank you, first incarnation of The (mis)Adventures of Wade.
Of course, this wasn’t my first step into the art world. Some of you may know that I used to fancy myself quite the artist. I even applied to some art schools. They unanimously rejected me. I had some very creative ideas, but alas, the talent just wasn’t there. I was just good enough to know how good I wasn’t. So aside from a doodle here, a sketch there, and a few paintings along the way, my forays into the art world have been a thing of the past.
But recently I found myself the new owner of a slightly used hand press and linocutting tools. I’ve always been interested in printing, and in something of a perfect storm, I’ve got a new hobby; a new hobby of which I know nothing about. Before nabbing this gear, the last print I made was over a decade ago in high school art class. I’m still sweeping a little dust off the creative side of my brain, and knocking some rust off of my hands, but so far I’ve really been enjoying myself.
I’ll try to keep you posted on how it goes. Who knows, maybe if you’re nice, you'll end up with a print or two.